Android project structure

A recovering perfectionist, and a tech lover.
Talks about tech staff most of the time.
Love cycling and watching movies/Anime.
Intro
The point of this article is to give you an idea about the android project structure.
Are you ready, It's time for a story, we want to build an application with a single page that has a single button, and whenever you click on that button it gives the user a feedback msg that the button was clicked.
So you start by creating an android project with empty activity over android studio but a wild project hierarchy shows up
Android project hierarchy
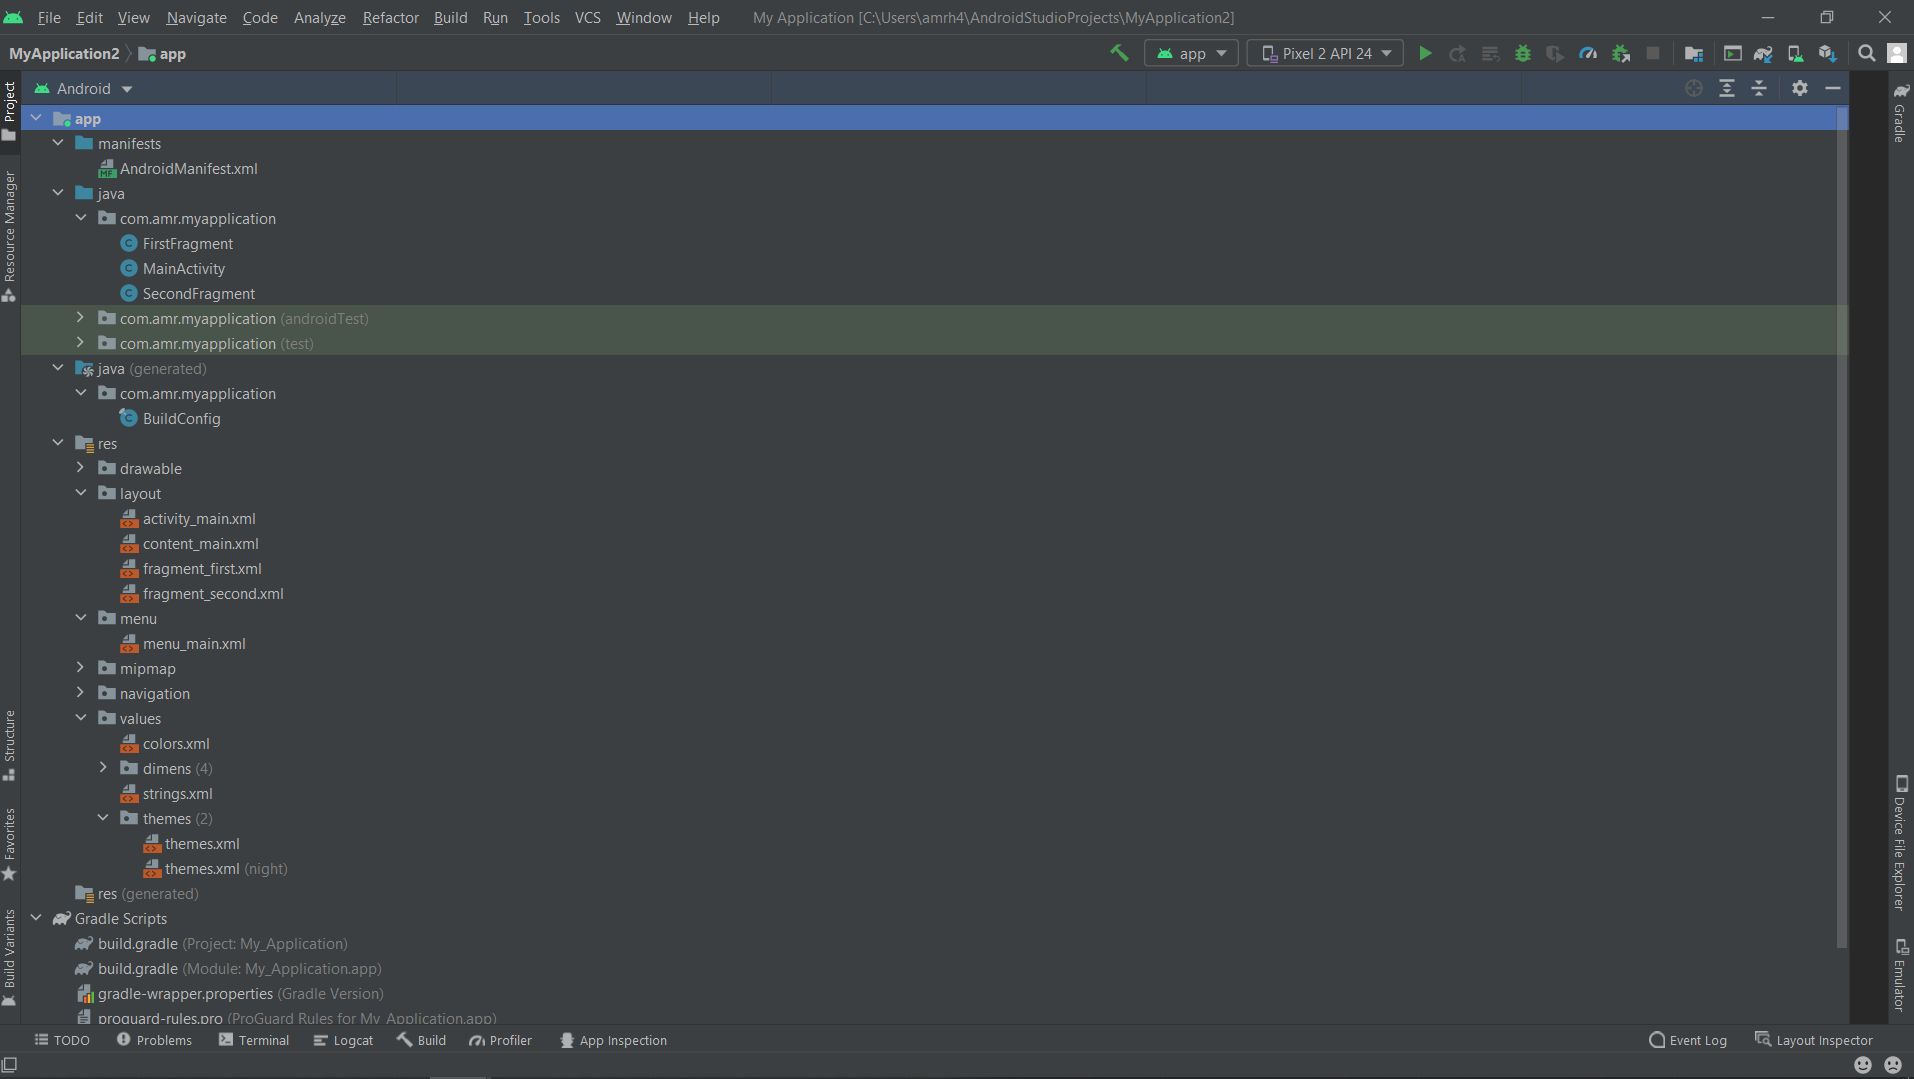 Here are the most used folders
- manifests
(you can specify the permissions here, your package name is defined here, every activity, service, everything needs to be mentioned here ) - java/your-package
(contains your logic, staff like what you want to do when the user opens the app, click on the button...etc) - res
- drawable
(Contains logo, images) - layout
(Your pages design and content) - values
(any description, the title basically any text on the UI should be written here & referenced in the layouts) - build.gradle (Module)
(The place where you set your dependencies, add different build types, versioning your builds)
- drawable
Of course, there are other folders & files but these are the ones that you are going to deal with the most.
The run flow
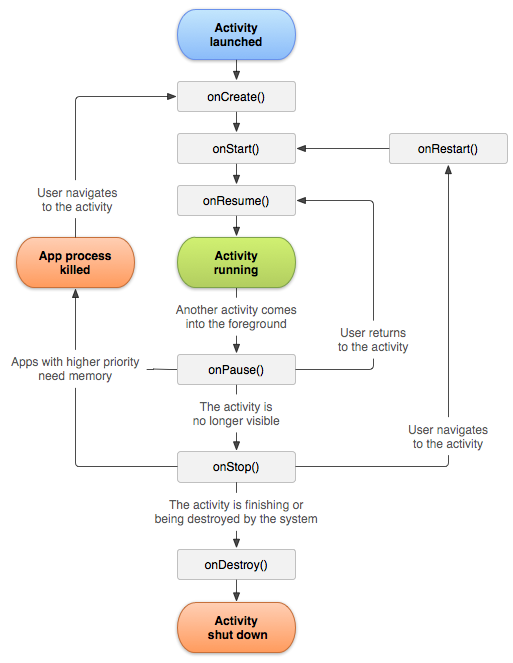
Image source
When you run the app, the first thing execute is the MainActivity, and any activity has the above lifecycle where it calls onCreate() at the beginning, so there where we will find the main layout rendering.
     protected void onCreate(Bundle savedInstanceState) {
        super.onCreate(savedInstanceState);
        setContentView(R.layout.activity_main);
    }
Which in return start rendering the mentioned layout inside the /res/layout folder where it contains something similar to this
<?xml version="1.0" encoding="utf-8"?>
<androidx.constraintlayout.widget.ConstraintLayout xmlns:android="http://schemas.android.com/apk/res/android"
    xmlns:app="http://schemas.android.com/apk/res-auto"
    xmlns:tools="http://schemas.android.com/tools"
    android:layout_width="match_parent"
    android:layout_height="match_parent"
    tools:context=".MainActivity">

     <Button
        android:id="@+id/my_button"
        android:layout_width="wrap_content"
        android:layout_height="wrap_content"
        android:text="@string/my_button_text"
        app:layout_constraintBottom_toBottomOf="parent"
        app:layout_constraintLeft_toLeftOf="parent"
        app:layout_constraintRight_toRightOf="parent"
        app:layout_constraintTop_toTopOf="parent"
         />

</androidx.constraintlayout.widget.ConstraintLayout>
Notice this line
<androidx.constraintlayout.widget.ConstraintLayout .....>It says
contraintLayoutcan you guess what it might imply? it implies that there are different layouts. So what are they? and which one you should use? There are many layouts for example StackLayout, RelativeLayout, GridLayout...etc each one has its own use cases. But if you have a large and complex design with some sort of relationship between sibling views and parent layout thencontraintLayoutis the one for you.for example, if you want to position a text at the middle of the view you can just add to the element definition
        app:layout_constraintBottom_toBottomOf="parent"
        app:layout_constraintLeft_toLeftOf="parent"
        app:layout_constraintRight_toRightOf="parent"
        app:layout_constraintTop_toTopOf="parent"
Notice this line
android:text="@string/my_button_text"This will use the value defined in
values/strings.xmlas long as it has the same name and type<string name="my_button_text">Click!</string>This means when the view renders it will show a button with the text Click!
As you can see the layout has the button defined, but we need to add a click listener over the button so that when the user click it we can do something and that's when this android:id="@+id/my_button" attribute over the button come in handy so in the MainActivity inside the onCreate Method we can say
Button bt = findViewById(r.id.my_button);
bt .setOnClickListener(new View.OnClickListener() {
            @Override
            public void onClick(View view) {
                Toast.makeText(getApplicationContext(), "Clicked!!", Toast.LENGTH_SHORT).show();
            }
        });
This way whenever the button with key android:id="@+id/my_button" is clicked the func onClick will be executed
Congrats!! you finished the story and you have a button that whenever clicked will show a message.
See you in the next part